Description
“Stop your hood from sagging!”
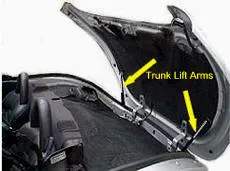
Every Prowler owner knows the struggle of having the hood constantly fall. The factory lift arms are just too small for the large Prowler hood. Even after replacing them, they wear out in months.
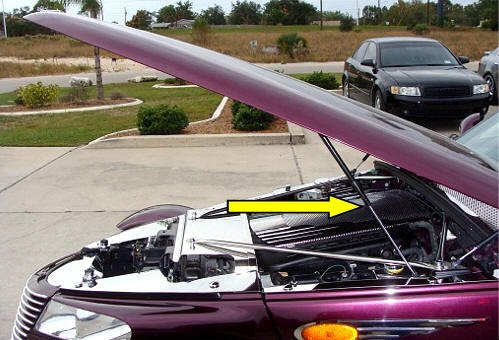
Here is the solution: our new super heavy-duty lift arm kit. It comes with one large, strong lift arm and specially designed top and bottom mounting brackets. It is easy to install or remove.
This kit uses factory brackets and requires drilling one small hole in a factory bracket under the hood in the engine compartment, where the bottom end of the lift arm connects.
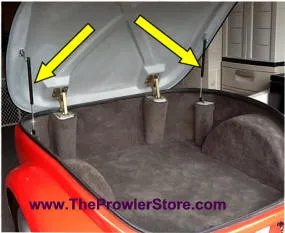
You can mount the strong arm while keeping your factory lift arms. The strong arm does not interfere with them and actually helps preserve their lifespan. Or, you can remove your factory lift arms and only use the strong arm. Either way, your hood won’t be sagging anymore!
Installation Instructions
Parts included:
- 1 Lift Arm
- 1 Lower Ball Head Bolt (with large washer and hex nut)
- 1 Upper Ball Head Bolt
- 2 Allen Screws with Allen Wrench (some kits may include regular head screws instead)
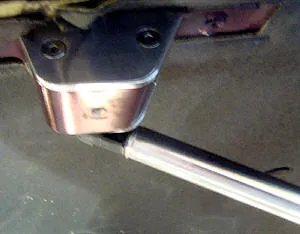
- 1 Top Anchor Assembly (two sides and one block in the middle)
Finally, an answer to the hood problem for the Plymouth Prowler. This new, simple-to-install kit is designed to work with the factory hood lift arms, preserving the lifespan of the original equipment while creating a very stable open hood.
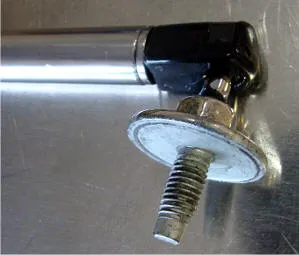
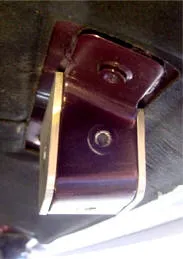
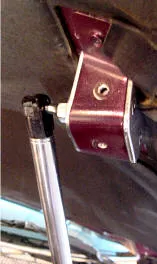
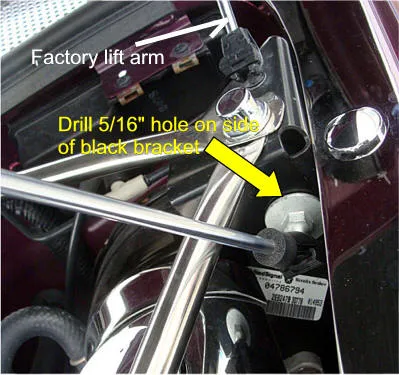
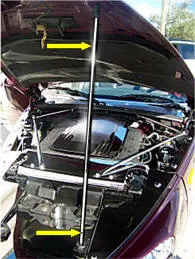
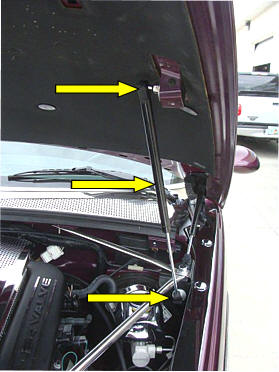
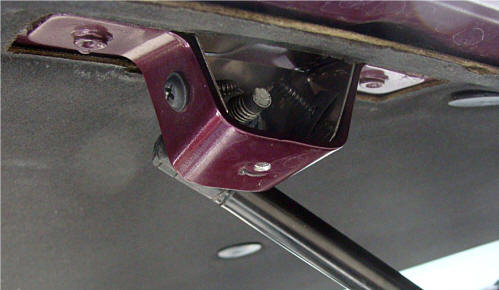
- Locate the steel bracket on the driver’s side that secures the factory hood prop and support rails. Mark the center of this bracket and drill a 5/16 hole directly in the middle (or adjust placement so the hood engine bars do not interfere). Bolt on the pivot ball at the end of your new prop. The hole must be this diameter. (See picture 6 below.)
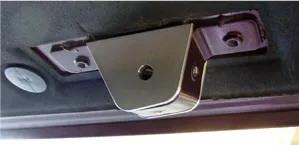
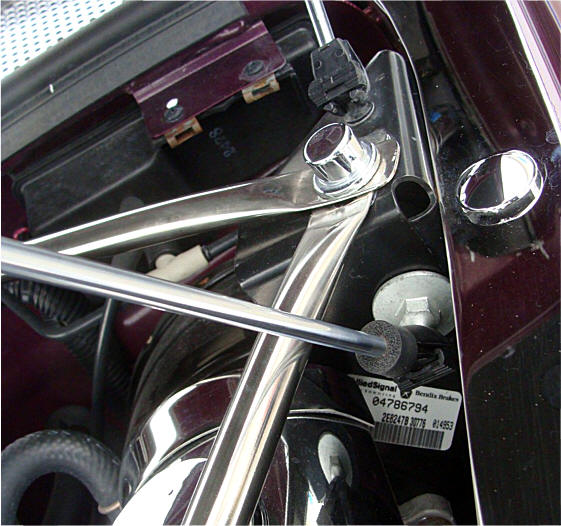
- Remove the attachment block from the new prop. Unscrew the side of the block using the provided Allen key and insert the block into the in-switch bracket attached to the hood. Reinstall the block’s side plate. Place the other side plate into the hood bracket, align the holes, insert the remaining pivot bolt, and tighten securely.
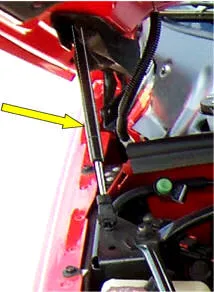
- With both pivot bolts in place, attach the new prop with the body of the prop positioned toward the hood bracket to complete installation.