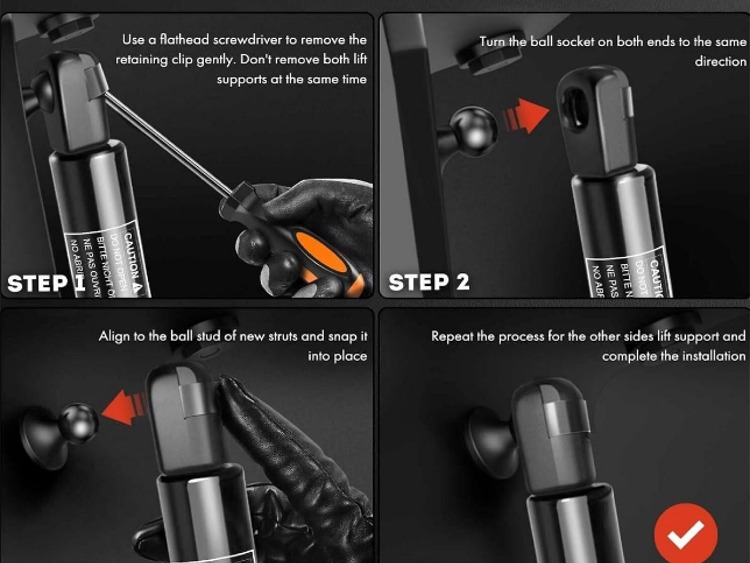
Description
Correct procedure for installation:
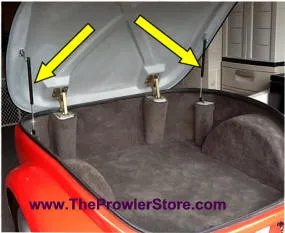
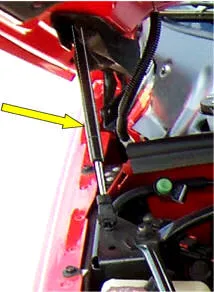
The Prowler hood supports have a slightly unusual locking arrangement, and if either end is not fully seated/locked, they can pop off the ball studs. This why installing them correctly is important- see directions below:
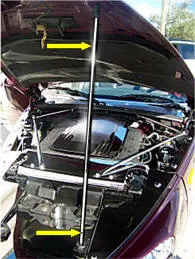
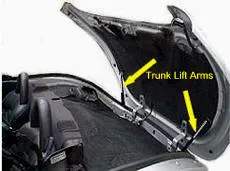
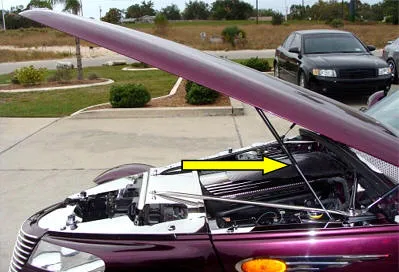
Support the hood fully open with a helper or a secure hood support. Replace one strut at a time, not both at once.
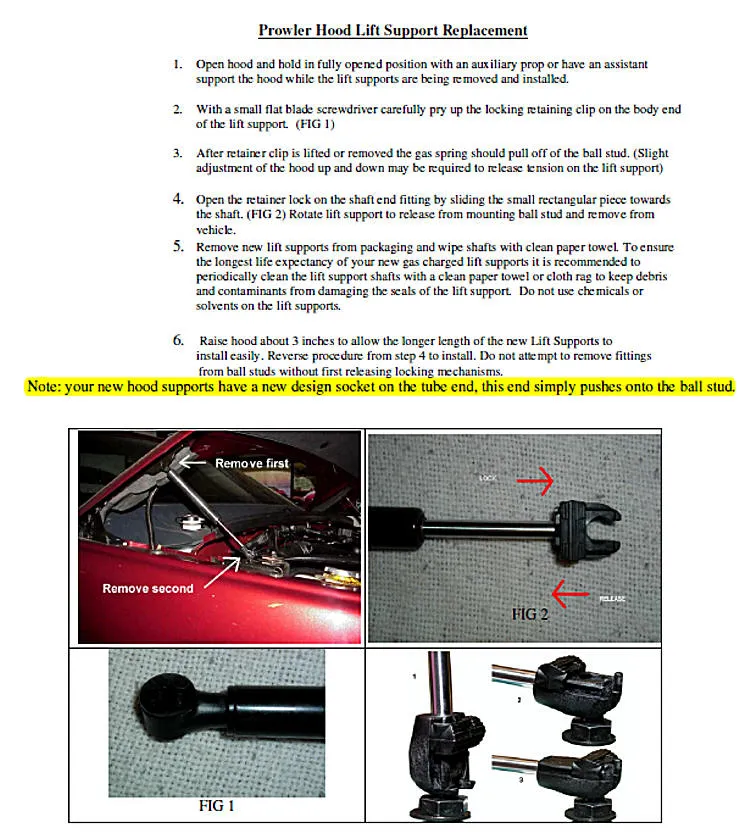
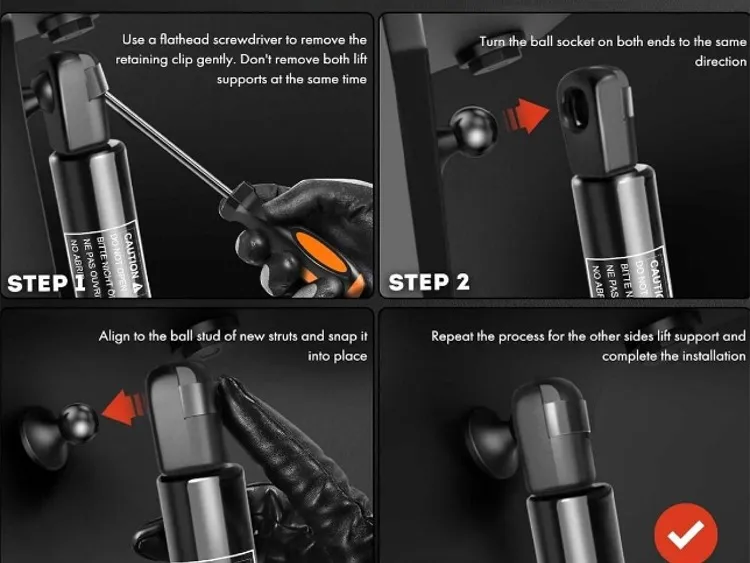
On the old support, release the body-end retaining clip with a small flat screwdriver. On the shaft end, slide the small rectangular locking piece toward the shaft before rotating/pulling the socket off the ball stud.
Before installing the new Stabilus support, inspect both ball studs. They should be round, smooth, firmly mounted, and not visibly worn or undersized. Also compare the new sockets to the old ones.
Install the shaft/small-rod end first. Stabilus and Lift Supports Depot both recommend starting with the shaft end. Put the socket squarely over the ball stud and push firmly until you feel/hear it snap completely over the ball.
If the opposite socket does not line up naturally, do not pry it sideways onto the ball. Rotate the body of the gas spring clockwise until the socket aligns squarely with the ball stud. Lift Supports Depot specifically notes that aftermarket supports may arrive with the socket orientation neutral and need to be rotated into alignment.
On the Prowler, you may need to raise the hood approximately another 3 inches to remove tension and allow the new support to line up because the replacement support may be slightly longer. The Prowler-specific installation sheet specifically calls this out.
Push the large-cylinder/body end straight onto its ball stud until it snaps fully into place. The Prowler instructions note that the newer-design tube-end socket simply pushes onto the ball stud.
Make sure every retaining clip/locking device has returned completely to its locked position. If the design has a removable wire clip, install the socket first, then reinstall the clip fully around the socket.
Pull firmly but gently on each end by hand before releasing the hood. Neither socket should move off the ball. Stabilus specifically instructs that the fitting must snap into place; Lift Supports Depot recommends a tug test after installation.
Slowly move the hood through part of its travel while watching both sockets. Make sure the support swivels freely on the ball studs and is not being side-loaded or binding.
Include photo attachedCorrect procedure for installation:
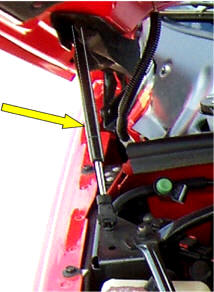
The Prowler hood supports have a slightly unusual locking arrangement, and if either end is not fully seated/locked, they can pop off the ball studs. This why installing them correctly is important- see directions below:
Support the hood fully open with a helper or a secure hood support. Replace one strut at a time, not both at once.
On the old support, release the body-end retaining clip with a small flat screwdriver. On the shaft end, slide the small rectangular locking piece toward the shaft before rotating/pulling the socket off the ball stud.
Before installing the new Stabilus support, inspect both ball studs. They should be round, smooth, firmly mounted, and not visibly worn or undersized. Also compare the new sockets to the old ones.
Install the shaft/small-rod end first. Stabilus and Lift Supports Depot both recommend starting with the shaft end. Put the socket squarely over the ball stud and push firmly until you feel/hear it snap completely over the ball.
If the opposite socket does not line up naturally, do not pry it sideways onto the ball. Rotate the body of the gas spring clockwise until the socket aligns squarely with the ball stud. Lift Supports Depot specifically notes that aftermarket supports may arrive with the socket orientation neutral and need to be rotated into alignment.
On the Prowler, you may need to raise the hood approximately another 3 inches to remove tension and allow the new support to line up because the replacement support may be slightly longer. The Prowler-specific installation sheet specifically calls this out.
Push the large-cylinder/body end straight onto its ball stud until it snaps fully into place. The Prowler instructions note that the newer-design tube-end socket simply pushes onto the ball stud.
Make sure every retaining clip/locking device has returned completely to its locked position. If the design has a removable wire clip, install the socket first, then reinstall the clip fully around the socket.
Pull firmly but gently on each end by hand before releasing the hood. Neither socket should move off the ball. Stabilus specifically instructs that the fitting must snap into place; Lift Supports Depot recommends a tug test after installation.
Slowly move the hood through part of its travel while watching both sockets. Make sure the support swivels freely on the ball studs and is not being side-loaded or binding.