


Description
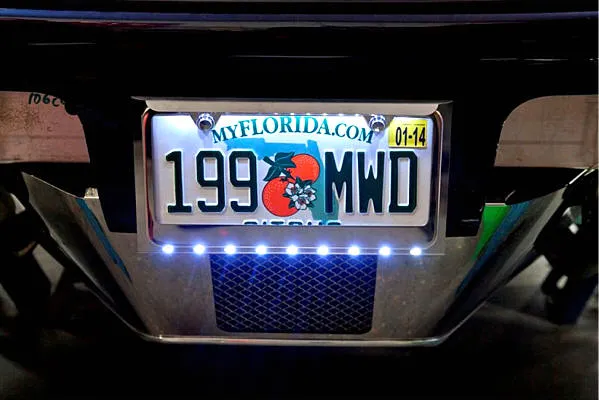
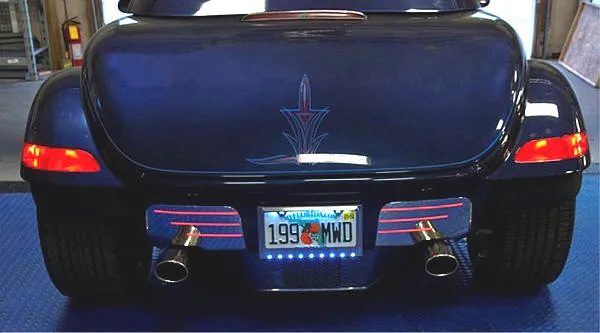
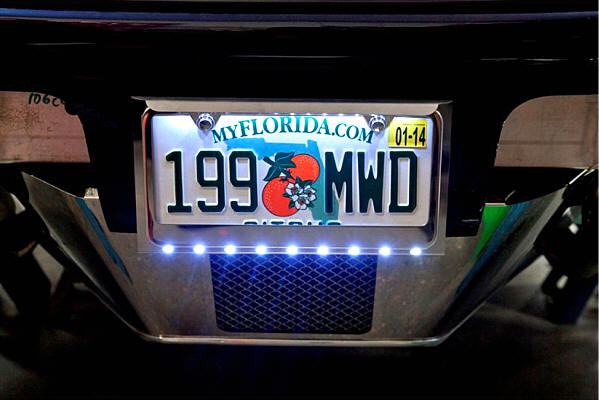
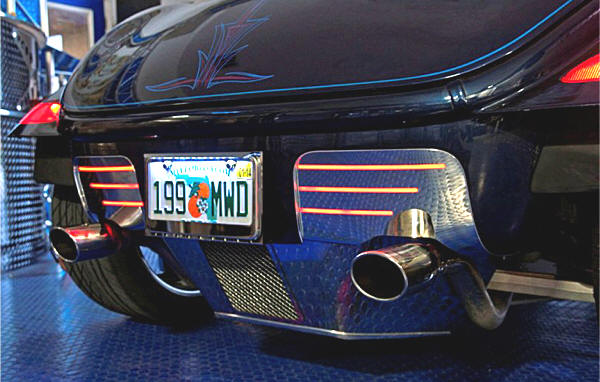
High-quality rear bumper polished stainless steel replacement panels. One panel for each bumper was removed (right and left side). Each panel includes three red LED light strips. A white line of LED lights under the license plate comes on when the car is in reverse. The license plate frame and backing are also illuminated. All lights (except reverse) come on with the parking lights or headlights.
*We recommend professional body shop installation for this item.
INCLUDED PARTS:
- 1 x Stainless Tag Frame
- 1 x Illuminated Tag Back
- 2 x Illuminated Filler Inserts
- 2 x 6mm Bolts
- 2 x Chrome Bolt Caps
- 2 x 6mm Nuts
- 9 x Red Butt Connectors
- 1 x Yellow Butt Connector
- 1 x Blue Butt Connector
- 4 x 24″ lengths of red and black hookup wire
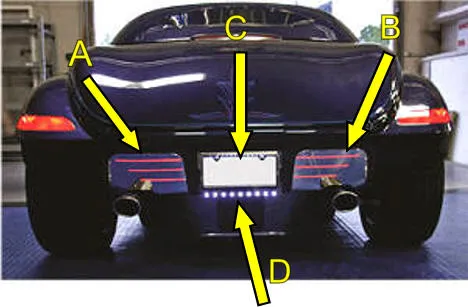
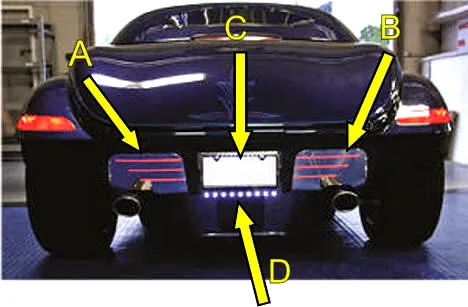
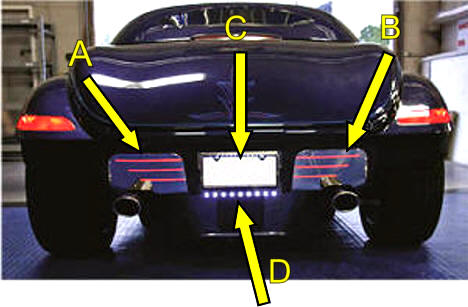
Above photos: A & B – Red LED running lights, C – White license plate light, white reverse light (comes on only in reverse).
PROTECTIVE LINER INFORMATION:
Your new accessories will arrive with a protective surface liner. Leave this liner in place until the installation is complete to prevent fingerprints and scratches.
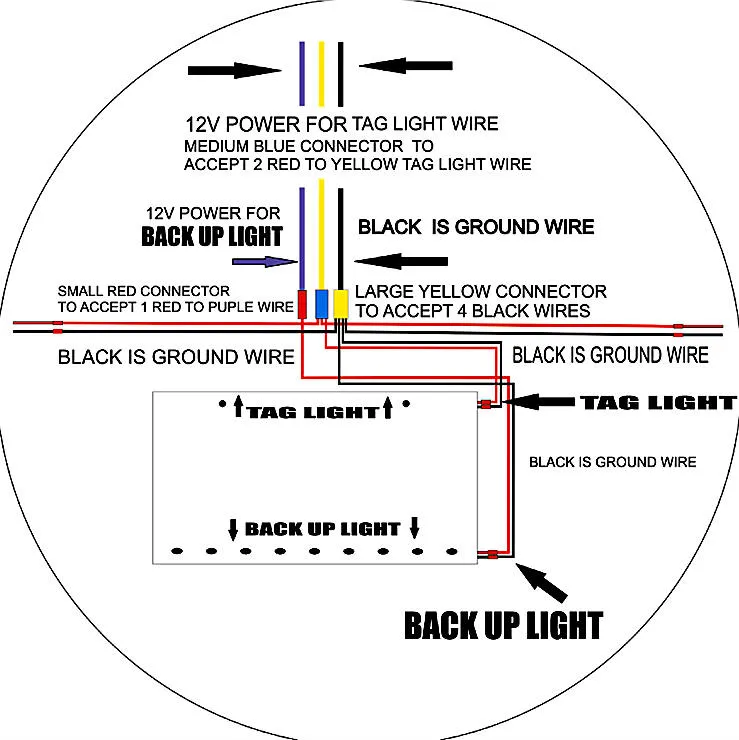
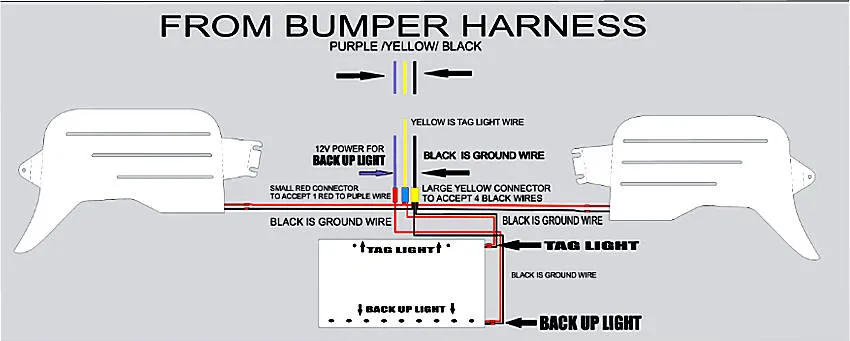
After removing your factory bumpers and disconnecting the electrical harness, you will need to create a new harness to illuminate the new tag back and filler inserts.
- Using one of the connectors from the factory bumpers, cut the quick connector off the harness and strip about 1/4 inch of insulation from the three wires. You will see three wires:
Black = Ground / Purple & Black = Backup Light Positive / Yellow & Black = Parking Light Positive.
Connect the black wire from the new harness to the factory black lead using the yellow butt connector. Connect three red wires to the yellow & black lead using a yellow connector, and the remaining red wire to the purple lead using a red connector. Once the harness is complete, route each wire to its correct location. The Prowler has two small factory holes behind the tag area—run the backup and tag light wires through these holes, and the other two wires out to the sides for the inserts. See diagram below. - At the tag back, connect the wires to the two leads using the four red connectors provided. Install the tag back with your license plate and the stainless steel frame using the two 6mm bolts. Push on the chrome bolt covers to finish this step.
- Connect the wires for each of the two inserts using the remaining red connectors.
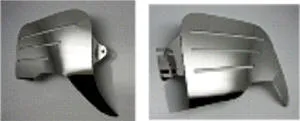
- Your new inserts come flat. Bend the two tabs along the perforated lines to nearly 90 degrees to form the insert. See pics 1 & 2. Once shaped, slide the insert point-first behind the body, aligning the notches over the two factory studs. Pull the body outward slightly to fit the insert under the edge, then align the tab hole with the body’s threaded stud. Adjust the rolled point to contour to the body. Reposition the body bracket over the stud and secure with one of the provided 6mm nuts. Do not overtighten—just snug. Repeat the same procedure for the opposite side.