Prowler Wiper Cowl Cover
Part#
ACC-822009
Page 2 of 2
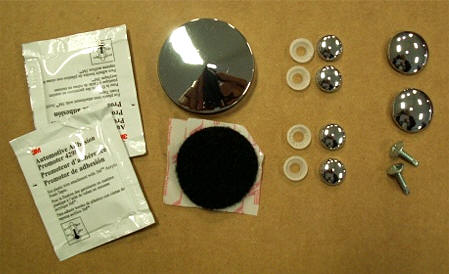
6. Once you are satisfied with the fit lift one end of the cover and peel a small section of the red release liner from the attachment tape but do not remove just yet. With a portion of the tape visible reposition the cover and insert the two factory screws thru the two white nylon sockets provided and secure both ends making sure not to over tighten as this will strip the factory nylon retainer.
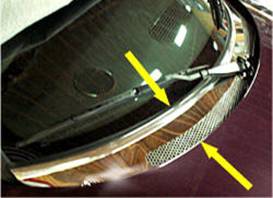
7. You have been supplied with two self tapping washer head screws. Place these two screws thru the two remaining nylon sockets and secure the center hole at the two small hole locations being sure not to over tighten as this will strip the metal of the factory wiper cowl. With all four locations secured carefully pull the release liner from the back of the unit slowly as to not allow the red tape to break off. With all four locations secured carefully pull the release liner from the back of the unit slowly as to not allow the red tape to break off. With the red liner removed press firmly along the top edge of the cowl to set.
8. Remove the protective liner and reinstall the two factory wiper arms. After the two arms have been bolted in reattach the wiper fluid supply tubes and insert the factory bolt caps. You have been supplied with two chrome 1” bolt cap covers. Apply a small dab of clear silicone to the underside of each cap and force them over the factory caps to finish this part of the installation.
9. You have been supplied with a chrome washer fluid cap. In order to install this cap scrub the top of the factory cap first with household rubbing alcohol to remove dirt then swipe once with the adhesive promoter provided. Trim the finger tab off the side of the factory cap but NOT the attachment strap your new cap cover has a small notch for this strap. Remove the attachment cookie from the underside of the new cap and attach to the factory cap. Then simply place the new cap cover in position. Reattach the hood.
10. After the new cowl has been successfully installed push the cowl down with your hand just behind the neck and set this position with the self tapping screw provided.