Page 2
of 3
Page 1
Page
2
Page 3
Prowler A-Arm
Kit Instructions
IMPORTANT NOTE:
When you place your A-Arm covers on there is a little maneuvering room.
Pull each of the four covers as far inside towards the cars body as
possible. In general you want to keep all sides of the covers
as close to the body of the car
as possible and as far away from the
wheels and tires as possible. This will prevent any possibility of the
wheels scraping the covers when they are turned to their extreme right
or left.
You will end up with about a 1/8 inch or so gap between the
A-Arm covers and the actual A-Arm.
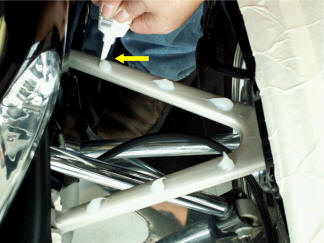
3. Put a glob of silicone on the top of the bottom A-Arms every couple of inches (see photo). Now set your lower A-Arms on top. Position them centered but away from the wheel. Press firmly all over the surface.
4. Now do the exact same install to the Top A-Arm Covers.
Once the A-Arms are siliconed down they will be bonded to prevent any movement or possible detachment. To Bond simply apply a wide bead of silicone (included) along the factory arm and carefully position new cover on the top of the A-Arm and press down.

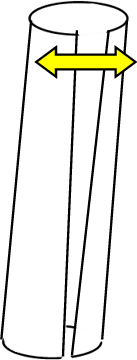
5. Stainless Steel Tubes: There are two tubes per side of different lengths. Hold each one up the A-Arm assembly to see which one goes where. The stainless tie rod sleeve cover is designed to mount between the rubber boot and the tie rod head. You will notice a long slit in the stainless tube cover, position this slit so that it spreads over the narrowest section of the tie rod and force it over and onto the length of area between the tie rod head and tie rod boot. Rotate the sleeve so that the slit faces up. Apply a thick bead of silicone into the slit so that when it comes in contact with the tie rod if will adhere. Rotate the sleeve back now so that the slit faces back (so it is not visible); Remove the protective liner from the top of the A-Arm cover.
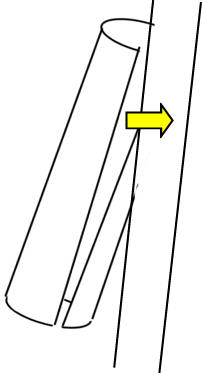
See how to force the top of the tube where the slit is open in below
diagram. Put the top
where it is separated on the factory rod and push along the length to
press the slit over the factory rod.
Once the slit tube in so try and squeeze with your hands to re-close the
slit as much as possible.


6. Now do pretty much the same install for the second stainless steel slit tube as above.
7. IMPORTANT: Once you have mounted the A-Arms have a partner get into your Prowler and rotate the steering wheel to its far right and far left position while you watch to make sure you have proper clearance during tight turns. Ensure the wheels are not hitting any part of the A-Arm assembly. Adjust as necessary.
8. Mount each Cap Cover on top of the A-Arm Corner.
9. Remove outer clear plastic liner on the stainless steel covers.
TheProwlerStore.com