


Description
The most cost-effective way to increase your horsepower! Designed specifically to fit the 1997–2002 Prowler. For off-road use only – non-CA CARB compliant.
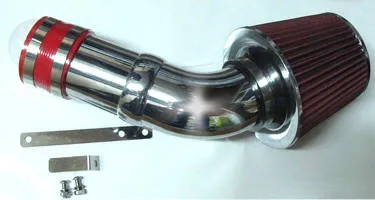
- Chrome ABS resin super-smooth piping for better direct airflow into the throttle body
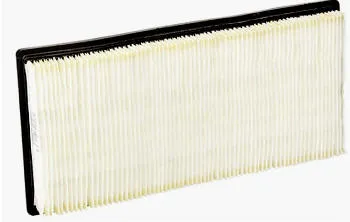
- Comes with a high-performance washable air filter (use any cleaning kit, such as K&N – cleaning kit not included)
- Clamps and rubber reducers included, as asann estimated an increase of about 10 HP
This kit is a medium-level install on your Prowler. You’ll need to remove the old factory air box and hose. Installation takes about 90 minutes.
INSTALLATION INSTRUCTIONS
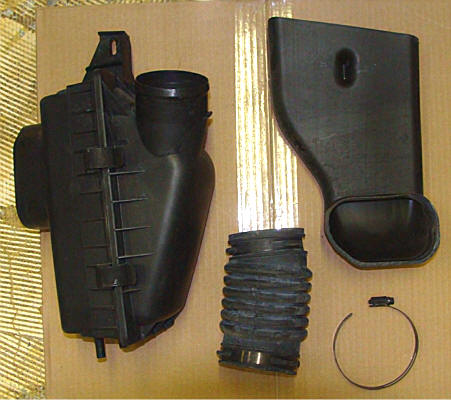
PARTS INCLUDED:
- 1 x Main filter and tube assembly
- 1 x Expansion collar with 2 stainless clamps
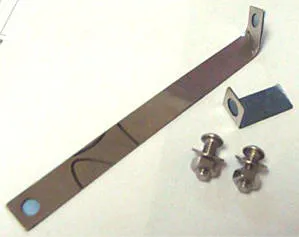
- 1 x Short 90-degree bracket arm
- 1 x Long flat bracket arm
- 1 x 1/4” 20 stainless nut and bolt
- 1 x 1/4” 20 stainless flat washer
This cold air filter has been constructed of chrome plastic tubing, which insulates the air intake from heat that typically accumulates in aluminum tubes. The filter itself has been oil-treated at the factory to catch the smallest contaminants, purifying the cool air and increasing engine combustion efficiency.
- Remove the passenger side body panel by unbolting the three top bolts. Pull out the panel, then lift it up and off.
- Loosen the steel clamp and remove the air snorkel.
- Remove the upper left-hand bolt securing the main air filter box.
- Jack up the front end of your Prowler and secure it with jack stands for safety.
- Loosen the air box clamp, detach the air box from the engine’s cradle tube, and pull the entire assembly out from the bottom of the car.
- Loosen the clamp of the crinkled tube and remove it.
- Install the new rubber collar and secure it tightly with the stainless clamp provided.
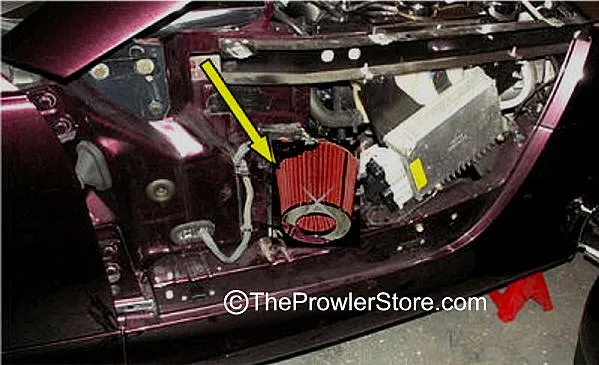
- Slide the second stainless clamp over the collar, then insert the new filter and tube assembly. Adjust its position so the filter head protrudes into the fender area away from the engine. Tighten the second clamp.
- Slide under the car and loosen the clamp securing the filter head. Slide the stainless L bracket so the hole faces downward, then retighten the filter clamp. Remove the harness retainer closest to the new filter. Bend the straight stainless bracket at a 45-degree angle so it can reach the L bracket and the firewall stud.
- Attach the long bracket to the L bracket with the nut and bolt assembly provided (do not tighten yet). Slip the end hole of the bent bracket onto the firewall stud and reinstall the factory wire harness retainer. Adjust all positions, then tighten the nut and bolt assembly.
- Reinstall the factory fender to complete the installation.