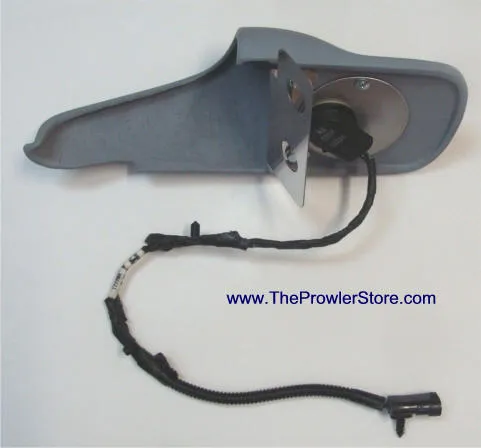


Description
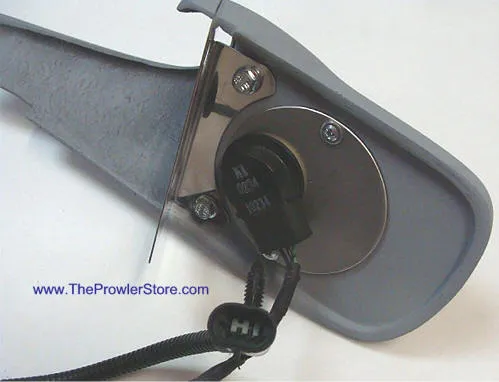
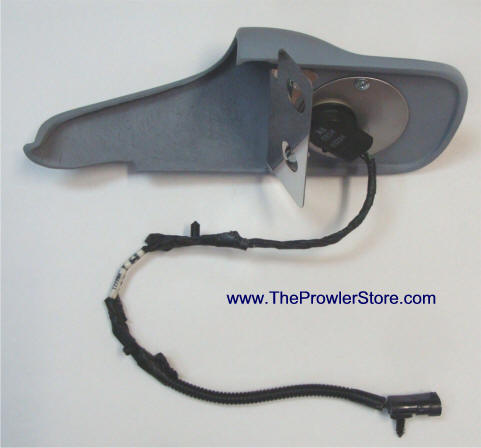
Includes bulbs and quick-connect wiring harnesses
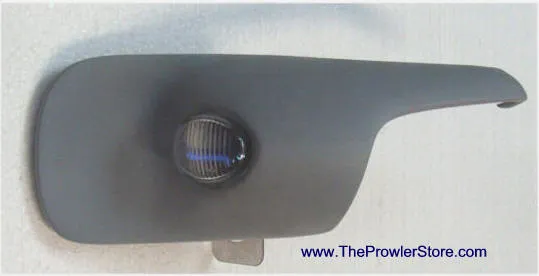
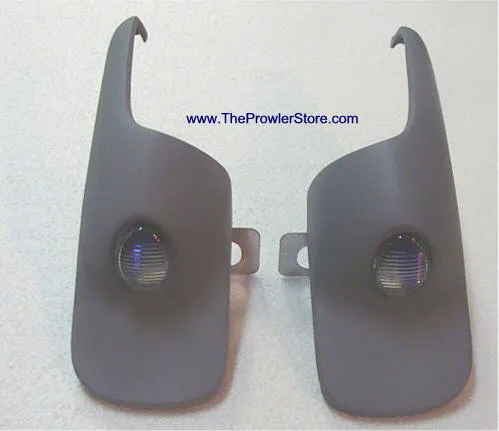
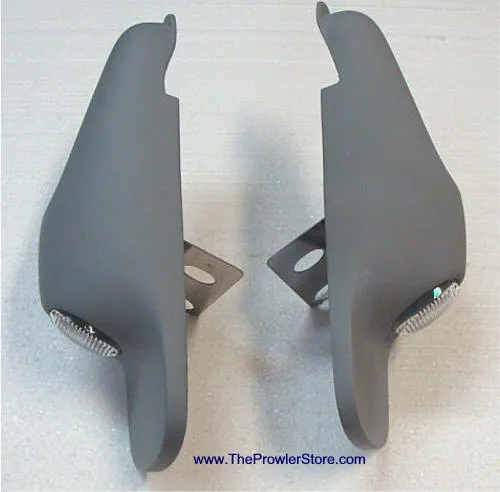
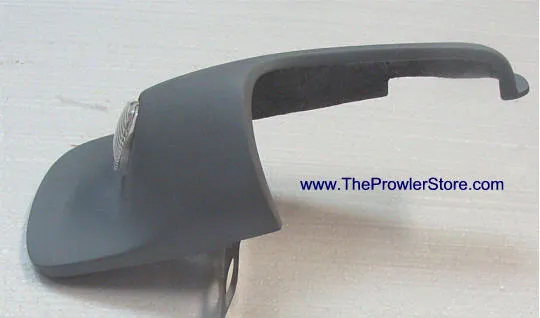
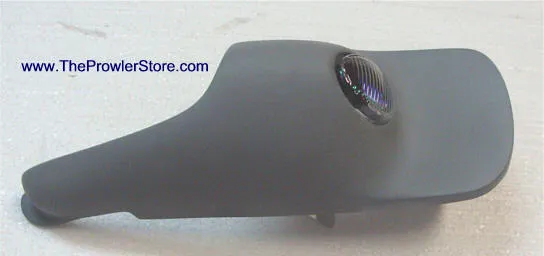
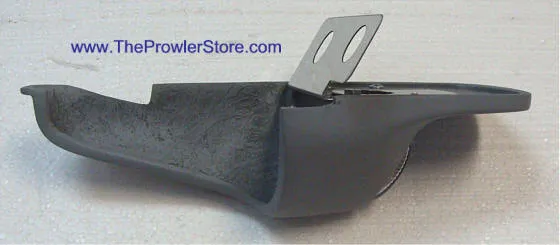
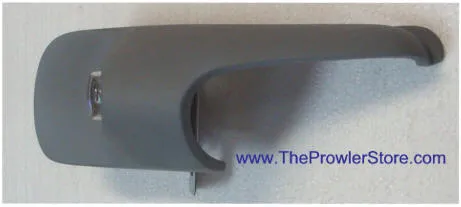
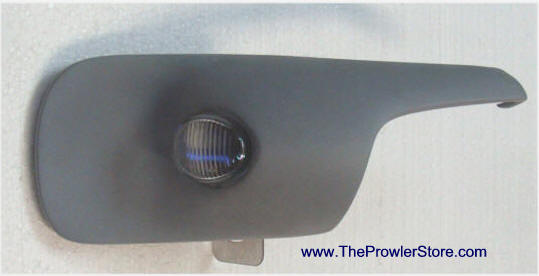
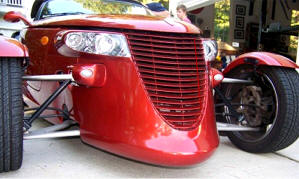
NEW! These heavy-duty fiberglass bumper removal fairings come in primer and are paintable.
They beautifully cover the two holes left in your side fenders after removing your front bumpers.
They are classy yet unobtrusive and look like they came with the car.
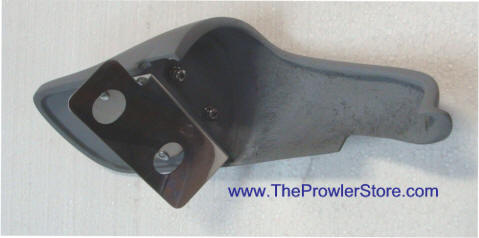
Each fairing includes a turn signal light on each side.
Easy installation includes plug-in turn signal wiring.
These can be painted and are easy to install or remove without damaging your car’s body.
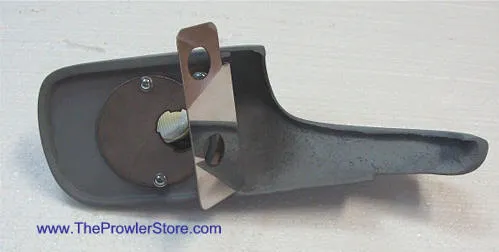
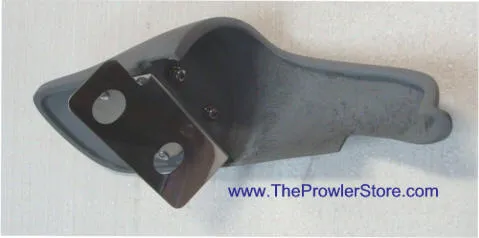
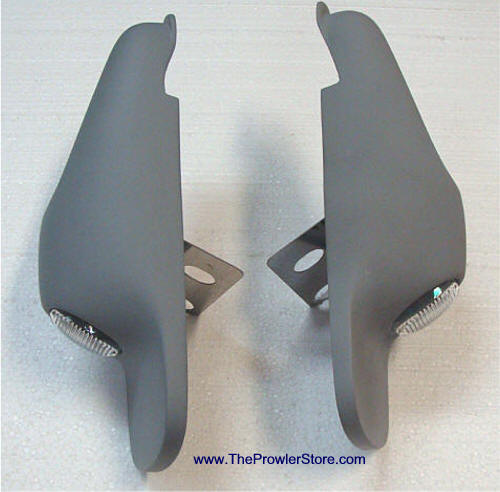
Includes all mounting brackets.
They will not rust, stain, or corrode even in winter snow.
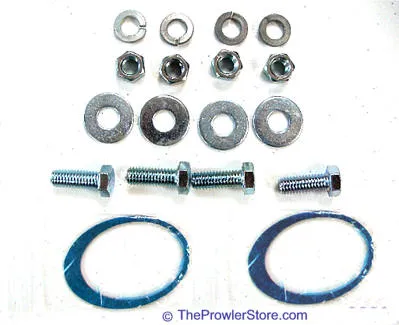
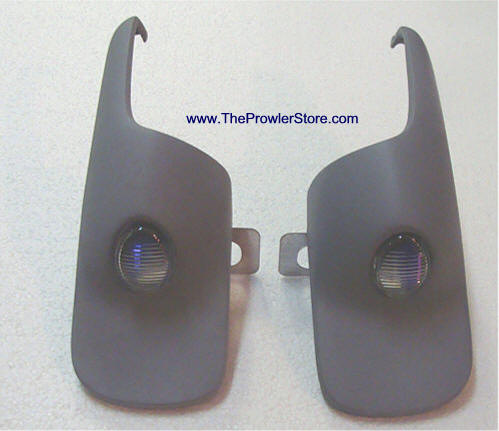
PARTS INCLUDED:
- 1 x Driver Side Turn Signal Fairing
- 1 x Passenger Side Turn Signal Fairing
- 2 x Wire Harnesses with bulbs
- 4 x 3/8″ x 1″ Bolts
- 4 x Fender Washers 3/8″ x 1.5″
- 4 x Lock Washers
- 4 x 3/8″ Nuts
- 2 x Optional Trim Rings
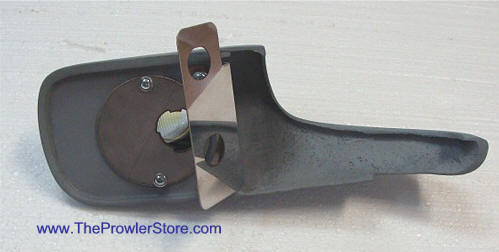
This kit is designed to be used as a replacement turn signal housing when removing the factory front bumper (plug and play).
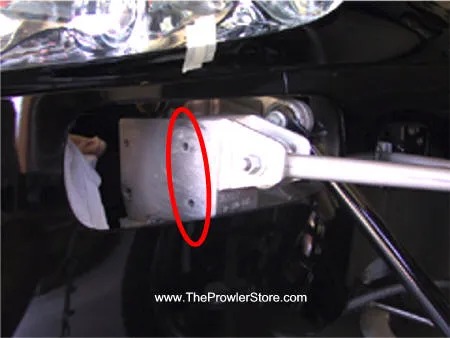
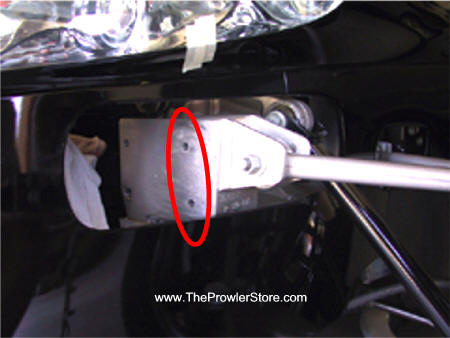
- Place the turn signal fairing into the opening created after the front bumpers have been removed. Be careful not to damage your paint. Take a few minutes to inspect the fitment and adjust the rear corner by hand so the curve matches the opening’s shape. Also, note the position of the fairing at the main frame to see if any adjustment is needed at the mounting tab. The tab has two large holes, allowing you to position the fairing at the right angle and position it for the body.
- Once you understand how the fairing sits, proceed with attachment. The kit includes a replacement factory wire harness for the signal light. Connect the harness quick-connect plug to the vehicle’s receiving end to complete the circuit. With a friend’s help, hold the unit in position while your friend installs the two nut bolts with the large washers and tightens them securely. The washer goes on the front side over the large tab holes to secure the unit properly.
- Repeat the same process for the opposite side.
Note: For a video of the installation, see our website page:
https://youtube.com/watch?v=532U_1Zd3EI (video shows a stainless model, but installation is the same).
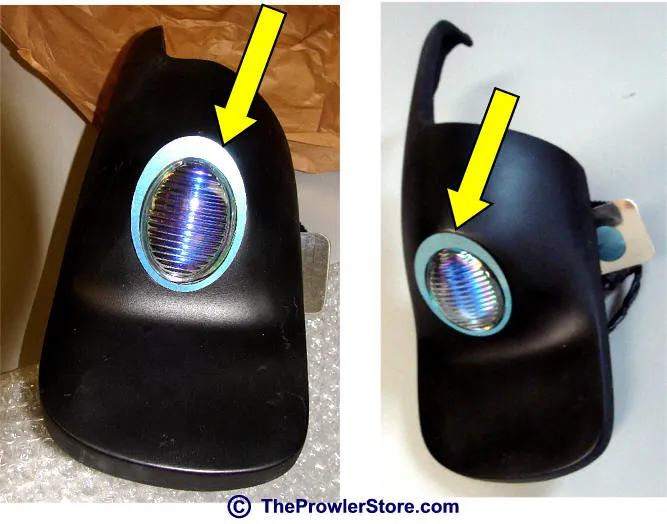
Optional Polished Stainless Steel Trim Rings
This optional trim ring goes around the light fixture. First, prep and paint your fairings. Once completed, install the trim ring if desired.
INSTALLATION INSTRUCTIONS
- Clean with rubbing alcohol to remove any oils, including finger oils.
- Once cleaned, stick a piece of masking tape to the area where the trim ring will mount. If it sticks, proceed to step 3. If not, repeat step 1.
- Take the stainless steel trim ring (without removing its back liner) and set it on the area where it will mount. Check the fit. The wide side of the trim ring goes towards the outside of the fairing. Slightly shape the trim ring with your fingers to match the curves of the fairing. It should sit naturally without forcing it.
- Once shaped, remove the back liner to expose the adhesive tape. Carefully place the trim ring and make final adjustments. Firmly press down along the trim ring to secure it to the painted surface of the fairing.
- Remove the protective plastic liner film from the top of the trim ring.
- Repeat the same process for the opposite side.