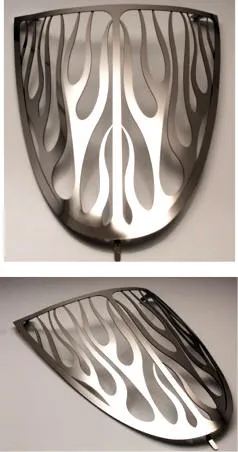


Description
It will never rust and will always keep its luster!
Only available at TheProwlerStore.com
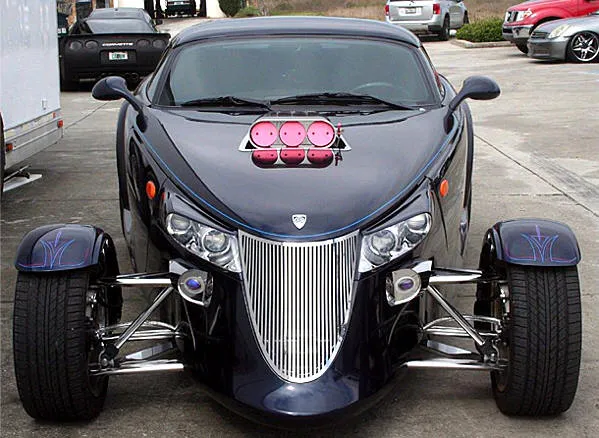
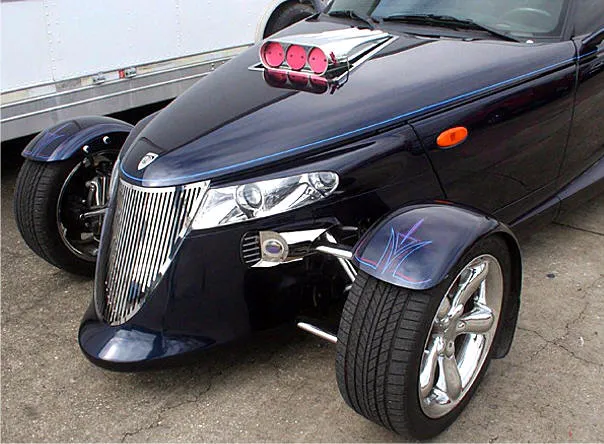
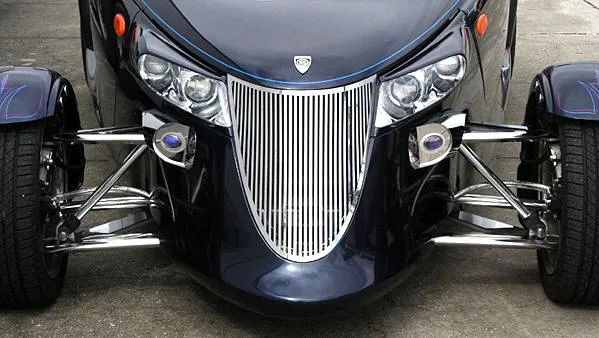
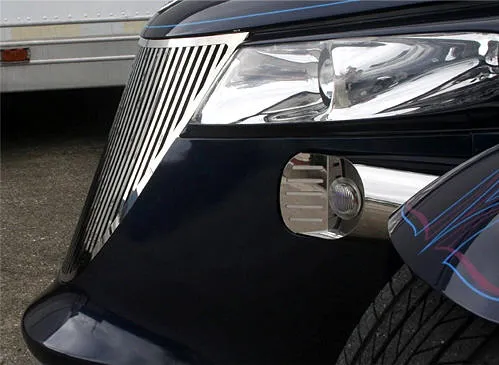
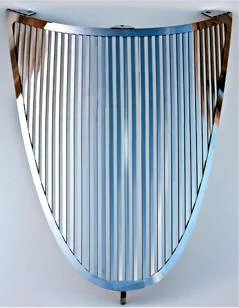
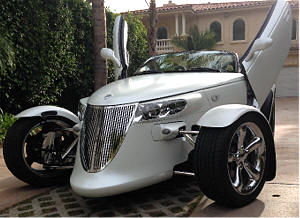
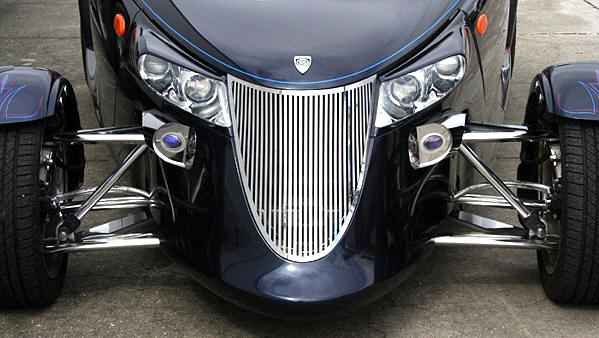
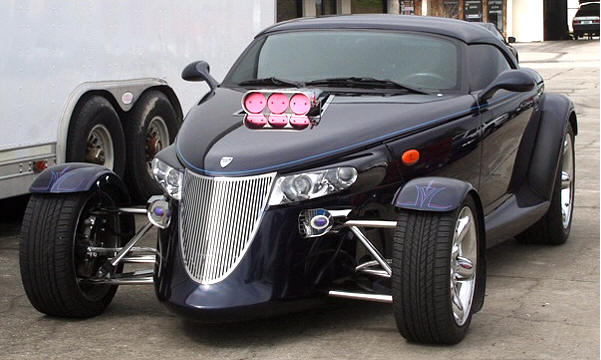
This is absolutely beautiful – you must see it mounted! Replaces your stock grille and fits existing factory bolt holes. You may put your stock grille back at any time. Easy to mount.
Made of pure, shiny, heavy-gauge stainless steel with a polished mirror finish. No maintenance required – it will not rust, stain, or fade. It will not come off on the road, even with vibration or potholes.
NOTE: Does not fit with the lighted grille ACC-822020 above.
INSTALLATION INSTRUCTIONS
Parts Included:
- 1 × Stainless steel retro grille
- 5 × 3/4″ round fuzzy Velcro pads
- 1 × 36″ long × 3/4″ wide matte black vinyl strip
NOTE: The stainless retro grille will sit about 1/4″ higher than the stock OEM grille to emulate vintage roadster styling. Adjust your hood bumper stops to compensate. Your stainless grille may need to be hand-formed (bent slightly) to match your Prowler’s front end. Read all directions before starting.
- Remove the factory grille by opening the hood and unscrewing the three screws securing it to the body. Remove the two additional screws securing the sides of the grille to the inner frame. Pull the grille toward the back of the vehicle to detach the lower chin pin from the body. See Diagram 1.
- Install your new grille insert in the same way the factory grille was removed, but without the two center metal attachment arms and screws — they are not needed.
- Before installing your new grille, clean and prepare the newly exposed area behind the factory grille for the best appearance. Thoroughly clean the exposed areas, paint the aluminum frame and any light-colored parts black, and apply the included matte black adhesive vinyl to the inner rim of the fenders (about 1/4″ in from the outer edge). This blackens the rim that would otherwise be visible through the grille.
- Check the curve of the new grille and hand shape, if necessary, for a proper fit. Insert the chin pin at the bottom of the grille into the notch at the base of the opening and make sure it is firmly seated. Adjust the hood stops up or down as needed to prevent pressure on the grille when the hood is closed.
- Set the top of the grille over the three exposed screw locations. Adjust until it tucks nicely under the hood. Place the provided fuzzy Velcro pads under the hood at the corners, center, and in-between to prevent paint damage.
IMPORTANT: Fitment Tips – Shut the hood gently the first time to check clearance:
- Make sure the grille is completely seated at the bottom.
- Push the grille back toward the engine during installation to allow extra hood clearance (see Diagram 1).
- Twist the hood counterclockwise to raise it and give more clearance (see Diagram 3).
- If clearance is still an issue (rare), add one or two washers under the hood latch base, then reattach.
CARE AND MAINTENANCE: Lightly dust your cover with a clean, soft cloth to prevent scratches. Then wipe with a new, clean, soft cloth and a quality streak-free glass cleaner.