Prowler Mud Flap Alternate Mounting Brackets
These directions are for you to install front mud flap mounting
brackets to a Prowler front fender where the factory mounting bracket
has been removed or never existed.
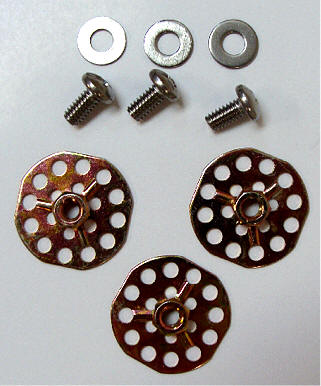 Included:
3 x Mounting brackets, 3 x Screws, 3 x Washers, Optional
Epoxy glue
Included:
3 x Mounting brackets, 3 x Screws, 3 x Washers, Optional
Epoxy glue
1. Clear off any blockages on the inside of the fender
where you are going to mount the brackets.
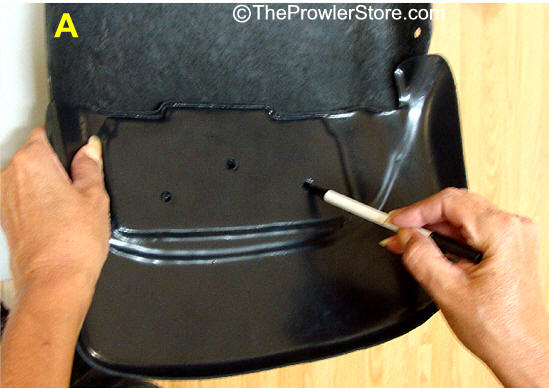
2. See diagram "A". Find a friend to help you on
this. Take a front mud flap and hold it up in place on the fender
exactly how it will be mounted. While one person holds it in
place, take a pen and firmly push it through the hole in the mud flap to
mark the inside of the fender.
Do this to all three holes in the mud flap.
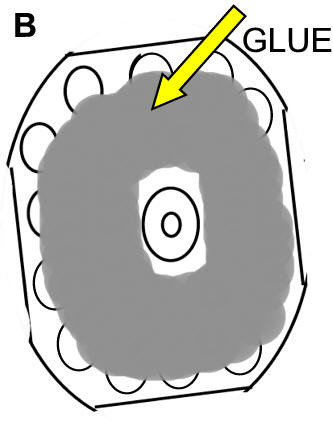
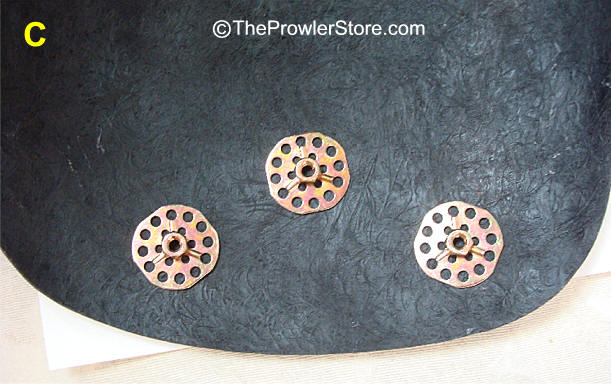
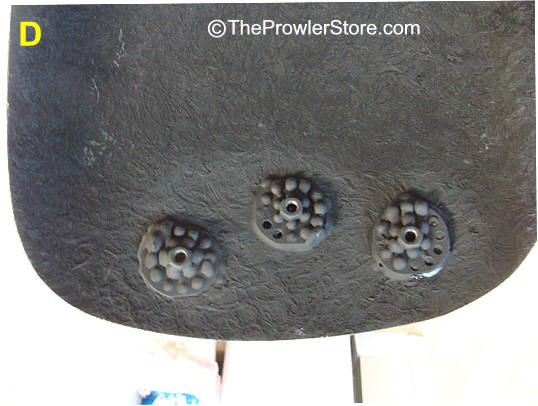
3. See diagram "B" & "D". Take your epoxy glue and
squeeze a liberal amount on the back side of one of the three brackets.
Do not put any epoxy in the center obscuring the center hole where the
nut is.
Line the center hole up to the mark you made on the inside of the fender
and press down the bracket in place.
Do the same for all three brackets.
It is critical to make sure the brackets
line up properly with mud flap mounting holes before the epoxy dries.
4. Now before the glue dries put the mud flap over the
three brackets and make sure the holes are aligned with the mud flap
holes.
If you are unsure you can someone hold the flap in place and you screw
the screws into the brackets to make sure they line up.
If they are not slide the brackets in their wet glue into place.
5. You can either remove the flap and let the glue dry
for 24 hours or duct tape the flap "installed" on the fender until the
glue dries.
6. Repeat for the other fender if necessary.
7. Note: If you find after the glue dries you a slightly off on the alignment you can drill out the mud flap holes until the flap will line up and mount properly. You can use larger washers to hold the flap in place.
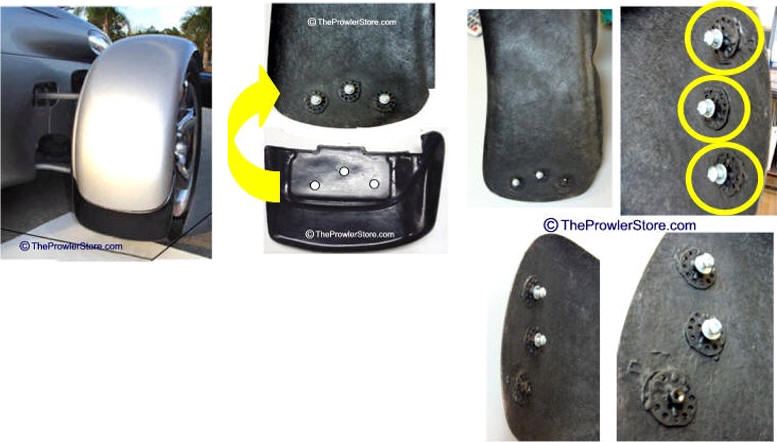
Reference Photos: