
Phone: 352
688 8160 M-F EST
Prowler Chrome trimmed Grill©
PART# BK-TPS001C
or G
INSTALLATION INSTRUCTIONS
Parts
Included:
17 x Individual
hand-worked Pre-sized and cut Vinyl flexible Chrome strips
1. BEFORE
you begin ensure that the 17 chrome strips are arranged by size. Each
strip has a tag on it. The largest strip is marked “T” meaning
Top. Each of the other strips are marked one down from the top. For
example; T-1 is one down from the top (T), T-2 is two louvers from the
top (T) louver and so on.
Note: Be careful not to bend
the strips sharply or at right angles or they might crease.
2. Wash
your Prowlers grill thoroughly before you begin installation. Let it
dry completely.
Next....
Wipe each grille
louver on your car with rubbing alcohol to remove any traces of oil
(even figure oil). Let dry.
3. Before putting each trim piece on each louver over bend each end - bend along the wide side like it will be mounted (see Figure 3). This will help to keep it on for the long run.
4.
Start at the Top Strip (T) of your Prowlers Grill with the louver
that is lined up with the top of your headlights. Start from one end of
the louver and line the end corner of the “T” strip up with it. Press
the corner on to the lover. Be sure that the end of the strip is lined
up with the lover. (See diagram)
Note: If
the sticker tags leave any residue on the chrome strips simply use a
piece of paper towel to wipe it off. You may have to rub or carefully
use your finger nail to remove any glue if necessary. You may also use
rubbing alcohol.
Note: No
glue is necessary to mount the chrome strips.
5. Once
the strip is started slowly press the chrome strip on to the remaining
louver until the entire strip is on and the ends are lined up with the
louver ends. Ideally you don’t want any of the louver front edge to be
visible. Each piece has been ‘pre-worked’ to make your job of working
with it easier. You can stretch and work with the strip somewhat to get
it into position.
Note: It
is best not to completely remove a strip once installed. Although
removing the strip will not damage your cars paint in any way,
once you press the strip back on it might not stick as well.
6. Now, take the next strip “T-1” and repeat the process. Continue until all strips are installed.
If any questions
occur during installation please contact us at:
admin@TheProwlerStore.com
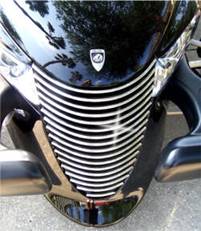
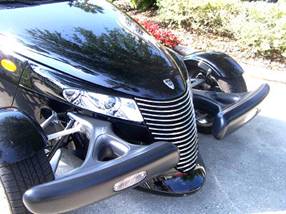
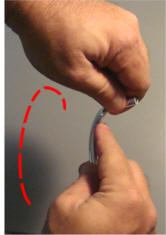
Figure 1
Figure 2
Figure 3
TheProwlerStore.com is a Hot Car Accessories, Inc. site