
Phone: 352
688 8160 M-F EST
PROWLER Heavy Duty Lift Arm
PART# ACC-823020
INSTALLATION INSTRUCTIONS
Parts included:
1-
Lift Arm
1- Lower Ball head bolt (with large washer and hex nut)
1- Upper Ball head bolt
2- Allen Screws with an Allen wrench (some kits will have regular head
screws instead of Allen's)
1- Top anchor assembly (two sides and one block in the middle)

Finally an answer to the
heavy hood problem for the Plymouth prowler. This new and simple to
install kit has been designed to be added to the factory hood lift arms
preserving the lifespan of the original equipment as it creates a very
stable open hood.
1. Locate the steel bracket on the driver's side that
currently secures the factory hood prop and support rails. Take a look
at the face of this bracket and mark the direct center with a marker.
Drill a 5/16 hole directly in the center of the factory bracket
or adjust to make sure that the hood engine bars do not interfere.
Now
bolt on the pivot ball at the end of your new prop. The hole MUST
be this diameter. (See picture 6 below).
You will notice that the new
prop contains two of these pivot bolts. You will use the one pivot bolt
that is attached to rod end of the new prop. The two pivot bolts are
different so make sure you use rod one at the bracket location.
2. Remove the
attachment block from the new prop. Unscrew the side of the block using
the Allen key provided and insert the block into the in switch bracket
attached to the hood . Reinstall the blocks side. Place the blocks
other side plate into the hood bracket and align the holes. Insert the
reaming pivot bolt and tighten nice and tight.
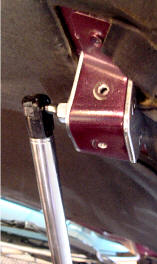
3. With the two
pivot bolt in place simply attach the new prop with the body of the prop
towards the hood bracket to finish the installation
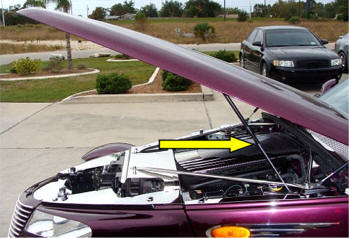
Picture 1
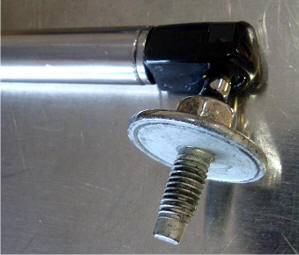
Picture 2
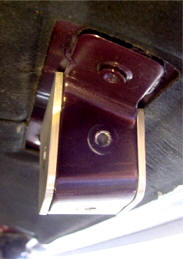
Picture 3A
Picture 3B
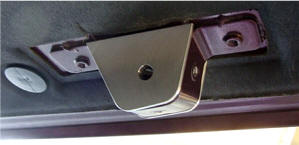
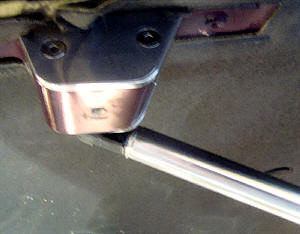
Picture 4 Top Mount
Picture 5
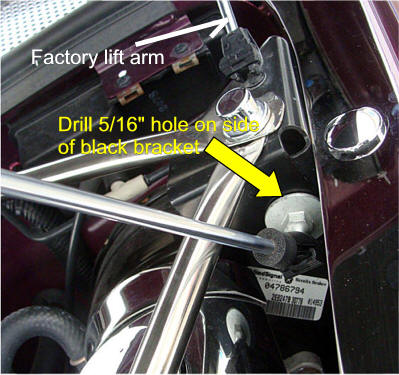
Picture 6 Lower Mount
TheProwlerStore.com is a Hot Car Accessories, Inc. site