![]()
13721 Spring Hill Dr., Spring Hill, FL 34611
Phone: 352
688 8160 M-F EST
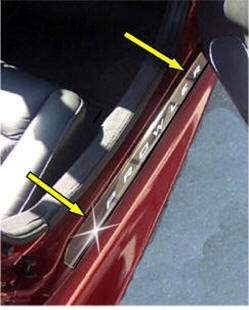
PROWLER DOOR SILLS©
PART# ACC-821002 (Polished or Brushed)
INSTALLATION INSTRUCTIONS
Parts included: Items Needed:
2 x Doorsills Household Rubbing alcohol
1
x Adhesive Promoter Packet
Tube of Clear Household
Silicone (found at any hardware department)
6
x (6mm Flat head Phillips screws 1" or 1 1/4")
1. Remove your current factory black plastic doorsill. You can do this by pulling it up slowly so as to allow any glue to come up as you pull.
2. Take your new Polished door sills and place them where they are to be mounted. Move them around until you are satisfied on how they fit. Once you are comfortable with how they fit move to the next step.
3. Clean the area with household rubbing alcohol until the entire area to be mounted is clean of any remaining glue or residue. Then swipe the area once with the adhesive promoter pack (provided).
4. Your new stainless sills come to you with three screws. These Flat head screws are designed to replace the three dome head factory bolts in the door sill area. Remove the three factory screws and replace with the screws provided. Place the new sill so that it fits properly and make note of its position. Remove the red liner from the attachment tape on the underside and reposition. Set the sill in place and press firmly along the entire surface to set.
5. Repeat steps 1-4 for the opposite door.

If any questions occur during installation feel free to contact us.
CARE AND
MAINTENANCE:
Note:
Care must be
taken when cleaning your cover. It is a good idea to lightly dust your
cover with a clean soft cloth first in order to prevent any particles
from scratching it. Then wipe (using a new clean soft cloth) with a good
quality streak free glass cleaner.
TheProwlerStore.com is a Hot Car Accessories, Inc. site