This has opened into a new window

352 688
8160 M-F
Prowler
Seat Lowering Kit (primary
seat or alternate seat mounts)
Instructions
ACC-821035
(This seat lowering kit will work for
either of the Prowler seat designs)
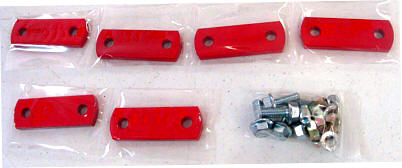
Kit includes:
6 x heavy duty metal red
brackets,
6 x 8.125mm bolts (NOTE: nuts do not go on these
bolts and will not fit)
6 x 5/16" lock washers
6 x 5/16-24 nuts
You will need: hand wrench, socket wrench, screw driver, a hand
punch, and a powered angle grinder.
NOTE: First - you need to know that there are three different Prowler factory seat set ups. You could have any one of those three. Each one is slightly different so the directions might be slightly off for your seat - you will just use common sense or give us a call 352 688 8160 M-F.
Instructions for 'Primary seat' - bolt studs installed- Installation.
This it has been designed to lower the driver seat some 3 inches buy eliminating the height adjustment mechanism. This will allow the seat to mount directly to the seats slide rail brackets.
1. The first step will be to unbolt the four corner bolts from the seat floor. Next detach the seat belt electrical connector then remove the seat from the car.
2. Unbolt the
height adjustment section of the seat bracket assembly on both sides of
the seat slide. This will be three nuts and bolts per rail (6 in all).
Note these original nuts and bolts can be reused.
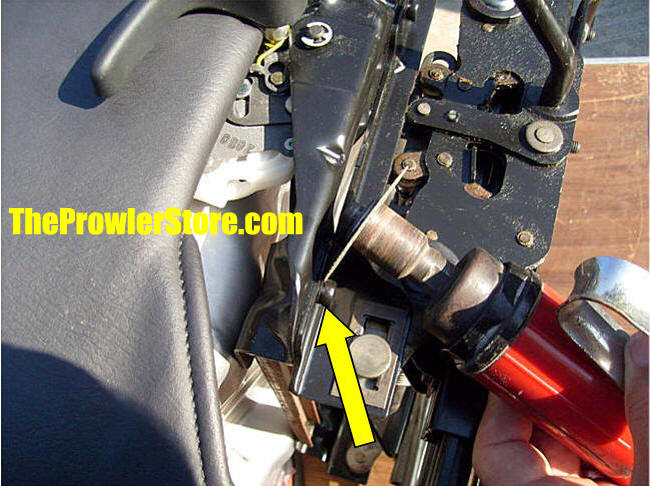
3. Next you will need to cut off the six rivets that attach
the rails. To do this use an air powered or electric angle cutter
disc to cut off the rivet heads. Once the heads are off you may
need to use a punch to knock out the remaining rivet bodies. The
six bolts we provided will be to replace the rivets.
4. Your kit comes
to you with three 1/4 ‘’ thick solid aluminum )red) brackets for each side of
the seat. Attach the thee brackets to the seat slide using the flange
style
8.125 mm bolts provided. Do this to both sides of the seat slide
brackets.
5. Flip the seat slide over and align the brackets with the actual seat bolt studs exposed on the bottom of the seat. Set the six lock washers over each stud and attach using the six 5/16-24 nuts provided and tighten the entire assembly. You may need to tap the brackets a little to get them to align over the studs properly. Once this is done simply reinstall the seat by reattaching the seat belt harness and bolt at the original floor mount locations and tighten.
NOTE: You may restore your seat back to stock at any time. However, you will replace the rivets with bolts. The seat will then work normally.
NOTE: You will want to measure the studs from center to center on your floor board and ensure that before you tighten down the seat lowering kit brackets that the width between the seat sliders is the same as it is between the floor studs so that your seat will slide.
Instructions for the 'Alternate seat' no studs installed - installation
1. After you have removed the seat lowering mechanism bolt on the three brackets at the factory threaded locations using the factory bolts. Two of these will sit closer to each other and the last one will be on the end.
2. With all six brackets bolted firmly in there correct positions flip the seat slid over and set it on top of the seat base.
3. Using the six flange bolts provided in your kit place four of them through the excising holes on the seat base and bolt together using the 8mm 1.25 nuts and lock washers provided.
4. Drill a 5/16 hole through the two remaining bracket locations and bolt the bracket at these locations also and then reinstall the seat.
NOTE: You may restore your seat back to stock at any time. However, you will replace the rivets with bolts. The seat will then work normally.
NOTE: You will want to measure the studs from center to center on your floor board and ensure that before you tighten down the seat lowering kit brackets that the width between the seat sliders is the same as it is between the floor studs so that your seat will slide.
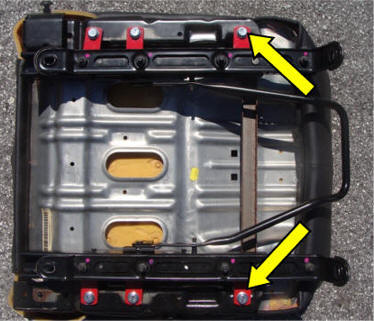
Arrow indicate where the two holes will be drilled for the alternate
seat design.
Prowler Drivers Seat Lowering Kit Pictures
Remove Drivers side seat:
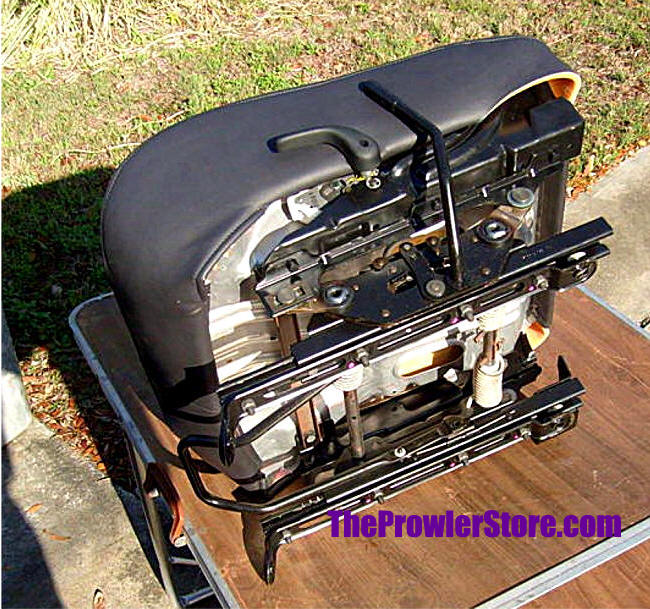
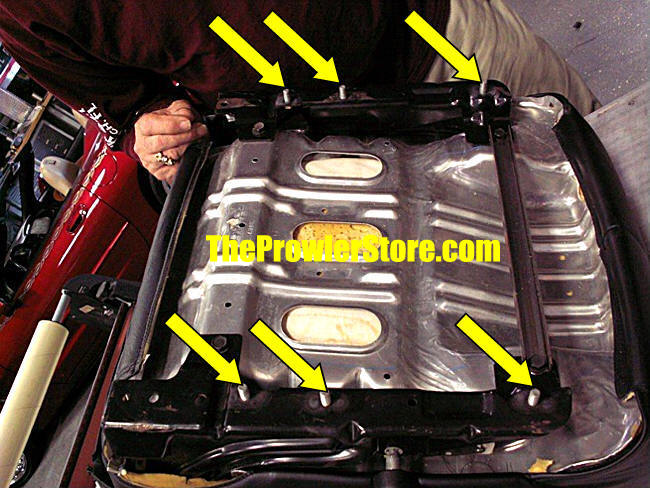
Underside
of stock Prowler Drivers 'Primary' seat
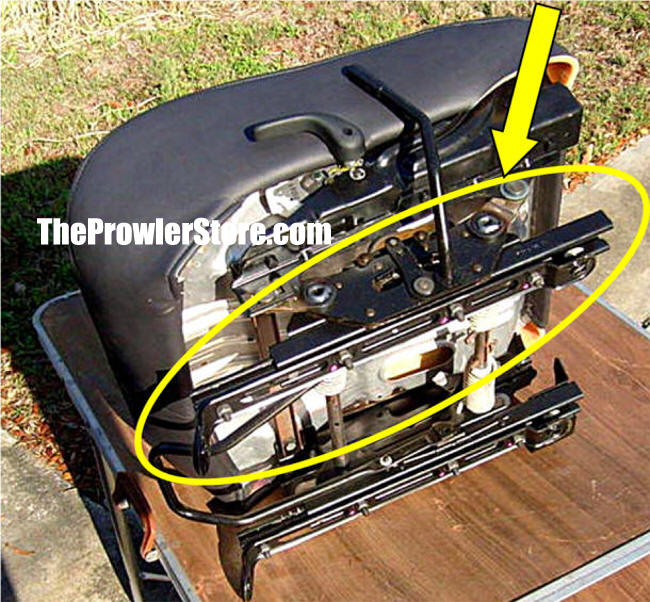
You will be removing this center seat adjustment (enables your seat
to move up or down).
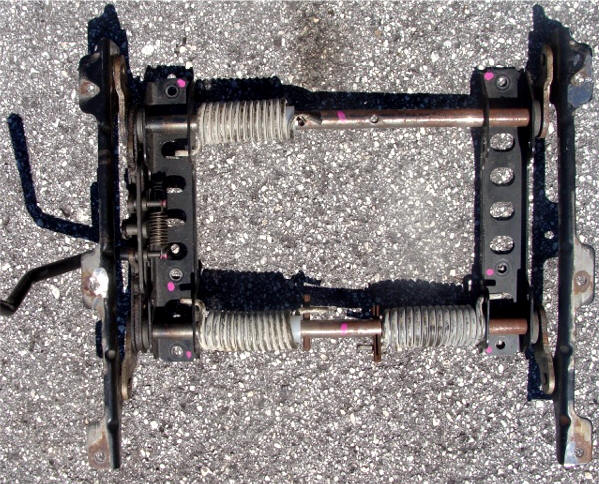
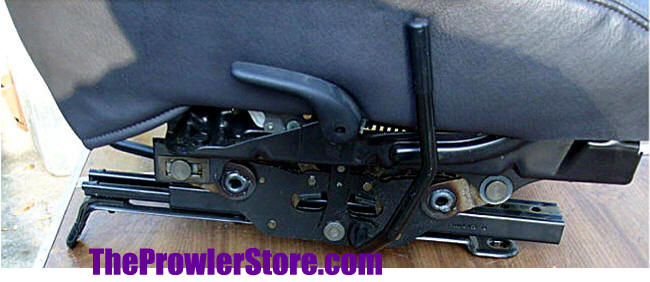
Removed assembly - will not reuse this.
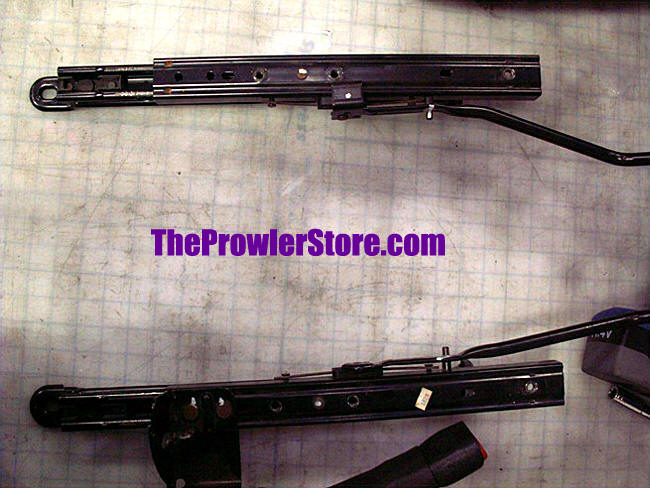
Take off side slide brackets as shown above.
You will need to unbolt
these brackets where there
are bolts and cut the heads off where there are rivets.
See pictures below.
The kits six mounting brackets shown with the bolts and nuts included
Mount the six mounting brackets as shown using the screws and nuts
included.
Now mount this bolts on the seat to the red brackets you installed on
the two seat slide brackets.
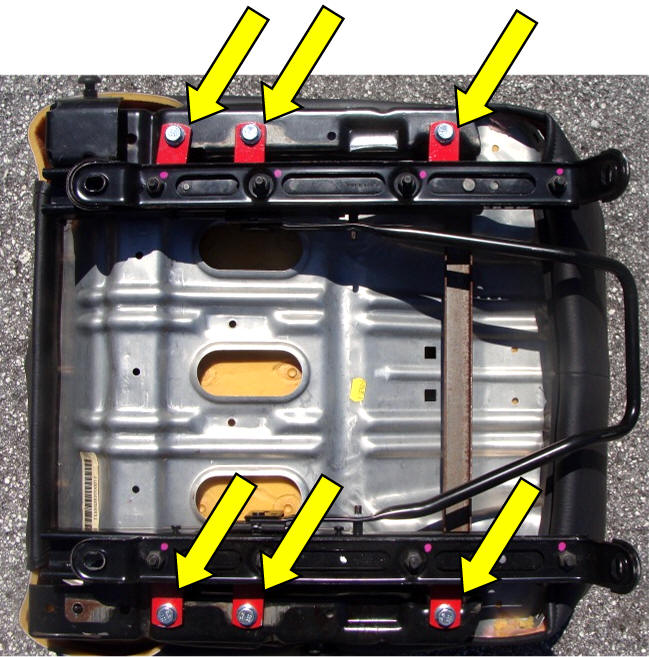
Alternate seat configuration shown - slightly different. This kit
can handle either seat.
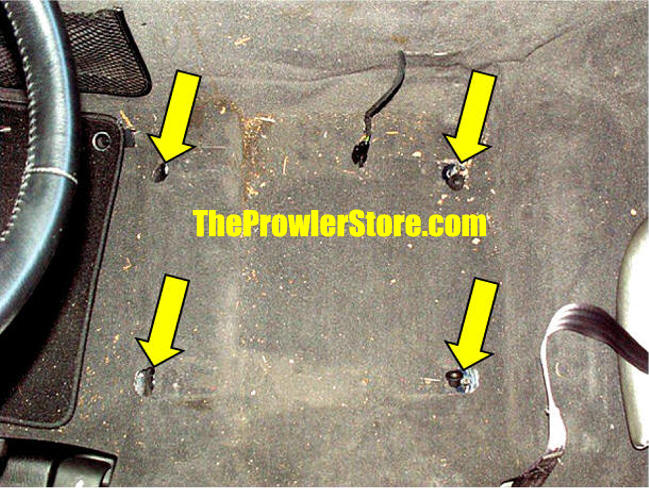
The floor after removing
the four bolts that hold the seat in. You will re-mount the seat
brackets back in the same place.
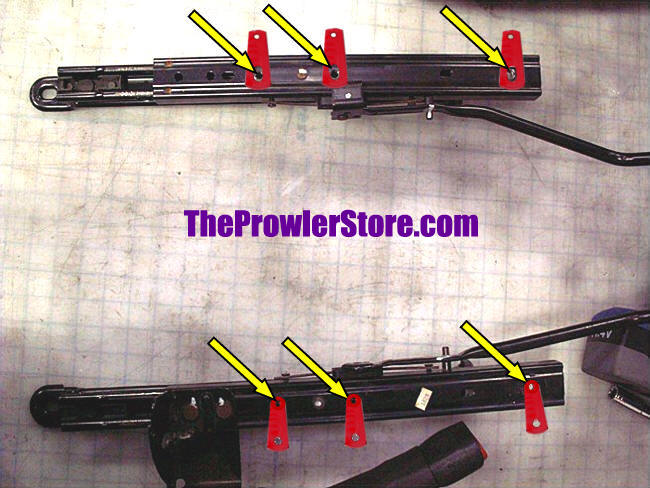
Pictures below show unbolting the bolts and
cutting off the rivet heads to the seat slide brackets
Half of the attachments are bolts that can be screwed off with a wrench.
The other half a large head rivets that will need to be cut off.
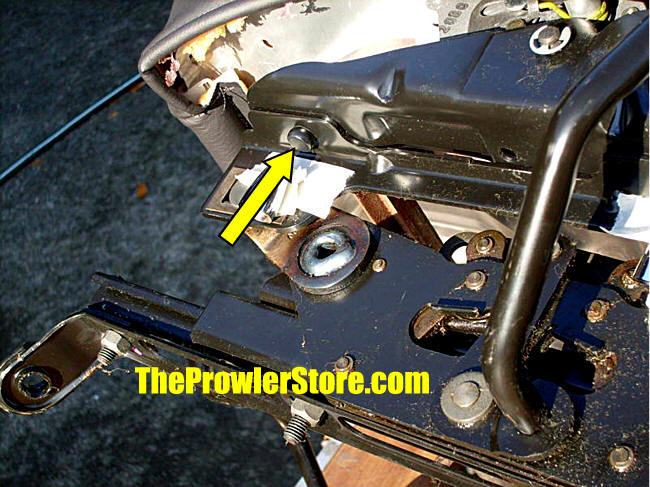
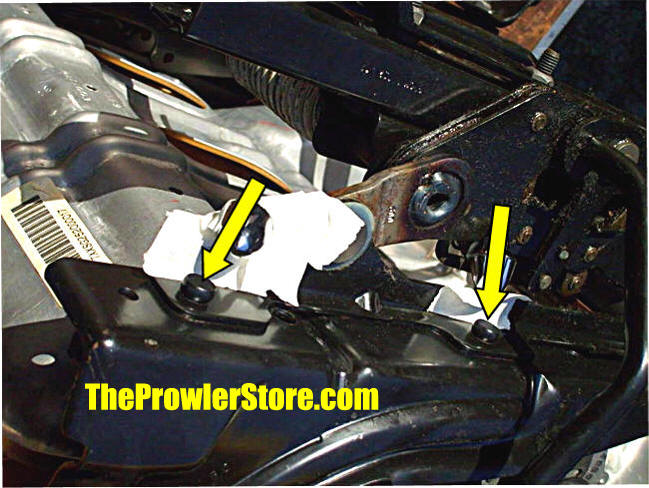
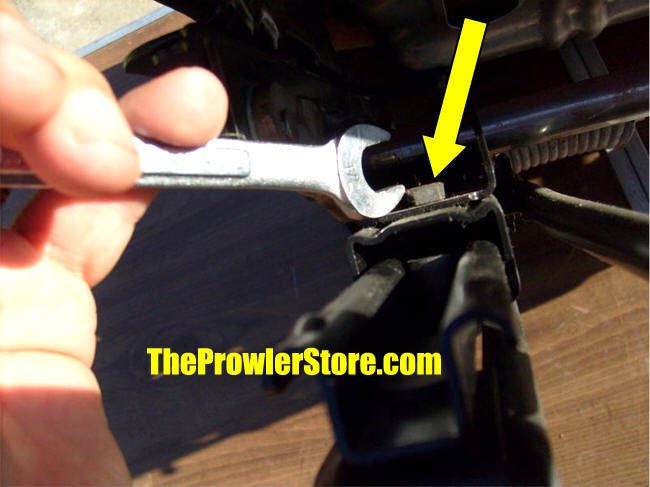
unbolt three bolts
Cut off rivet heads