
THIS KIT INCLUDES:
|
Ø 16 M8-1.25X30MM BOLTS WITH WASHERS |
Ø RIGHT AND LEFT HINGE ASSEMBLY |
|
Ø 2 SHOULDER BOLTS WITH WASHERS |
Ø 2 SHOCKS 480 PSI |
|
Ø 2 PINS |
Ø 6 WIRES AND CONNECTORS |
TOOLS REQUIRED FOR INSTALLATION:
|
|
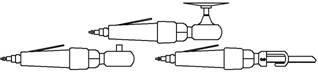
Ø AIR RACHET, GRINDER AND CUTTER.
|
|
|
Ø 7MM, 8MM,10MM, 11MM, 13MM, SOCKETS AND EXTENSION.
|
|
|
Ø FORK AND PHILLIP’S SCREW DRIVERS
|
|
|
Ø SPACERS FOR THE DOOR GAP.
|
|
|
Ø 3/16 ALLEN WRENCH
|
|
|
Ø 1/4 TORX BIT
|
|
|
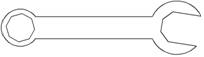
Ø 9/16 WRENCH |
|
|
Ø LOCKTITE RED |
OTHER TOOLS MAY BE NEEDED DEPENDING ON YOUR VEHICLE.
(Note: The pictures on the manual are for reference only they may not match your vehicle.)
1) Disconnect the battery.
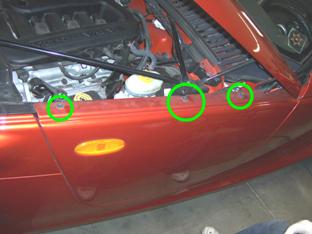
2) Remove fender:
Open the hood and remove the (3) 10mm bolts securing the fender to the body.
Before removing the fender make sure to disconnect the side marker wire harness.
3) Disconnect factory wire boot harness:
Disconnect pull on the factory wire boot by pulling it away form the
apron
and then disconnect the wire harness.
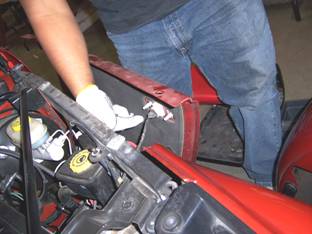
4) Remove the door catch:
Open the
door and remove the bolts securing it to the body and door, then push it
inside the door we’ll
remove it later.
5) Remove the door panel:
Remove
the (3) screws securing the door panel, to remove the door handle cover
you will
have to carefully push in and slide it towards the back of the door.
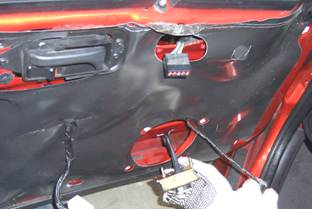
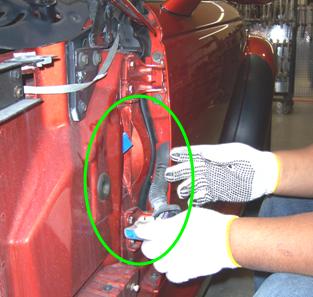
To gain access to the door catch you will have to remove the speaker.
After
removing the door catch pull back on the covering film and remove (2)
plastic
wire clips this will give you extra wire slack.
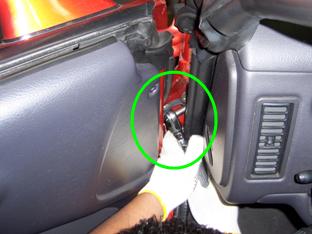
You will have to extend the wires going to the mirrors. Use the included wires.
After the
wires have been extended use zip ties to secure the wires to the
original holes
where the plug was before.
After extending the wires and removing the door catch replace the door panel.
 6)
Close door and use painter’s tape to secure the door in preparation for
factory
6)
Close door and use painter’s tape to secure the door in preparation for
factory
hinge removal.
You will need a 13mm socket to remove the factory hinges.
Hint*
(You can make your spacer out of paint sticks and about 8-10 turns of
blue painters
tape)

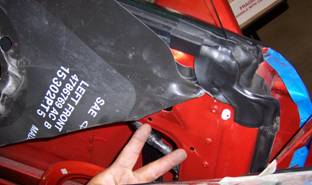
7) Modify the apron:
In order for the VDI system to work properly it has to sit flat on the apron.
Cut the apron as shown.
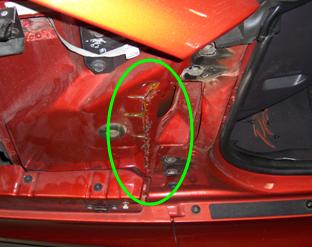
Use a
hammer the bend the left side first and then the right side so that they
form a
flat surface and layer one on top of the other.
After
achieving the flat surface use a rust preventing agent we used 3m
window-weld ribbon sealer,
to protect the exposed metal.
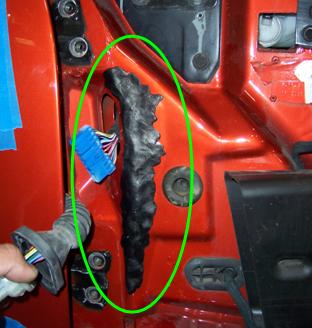
8) Install new Vertical Doors Inc. system:
After modifying the apron the new VDI system should sit flat against the apron as shown.
Hint* Tighten the bolts on the door first and then install the bolts on the body.
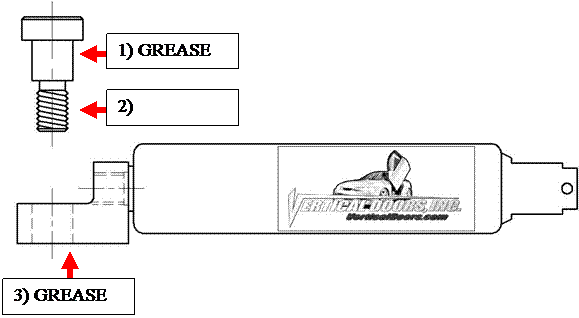
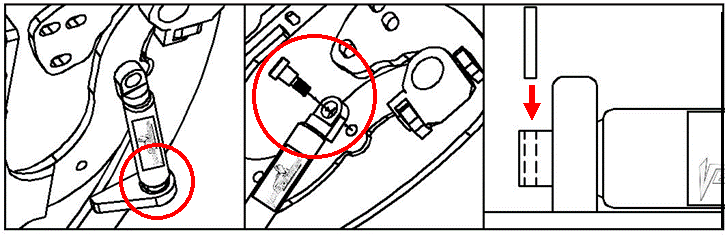
*IMPORTANT STEP: DO NOT SKIP THIS STEP. THIS STEP IS CRUCIAL IN YOUR INSTALLATION PROCESS, IF THIS STEP IS NOT COMPLETED WHEN INSTALLING THE VERTICAL DOOR KIT; ALL WARRANTIES ARE VOIDED, AND MAY CAUSE FUTURE PROBLEMS WITH YOUR VERTICAL DOOR SYSTEM.
1ST, make sure you put grease on the body of shoulder bolt where the arrow is pointing.
2ND, make sure you put red Locktite, where the arrow is pointing, on thread of shoulder bolt.
3RD, make sure you put grease on the bottom side of the shock end.


WARNING! THE USE OF ANY TYPE PLYERS, PAINT OR FOREING MATERIALS ON THE SHOCK’S BODY OR SHAFT WILL VOID THE WARRANTY.
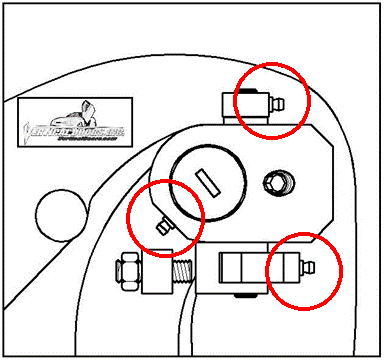
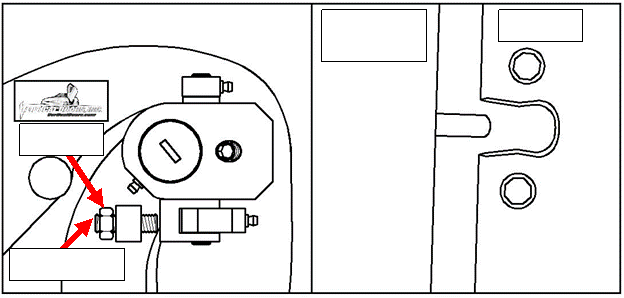 9)
Once hinge is locked in place, break nut #1 then turn Allen set screw #2
on fig until it hits the block then open the door and continue to adjust
until the door matches with the striker, open and close door making sure
it closes like factory.
9)
Once hinge is locked in place, break nut #1 then turn Allen set screw #2
on fig until it hits the block then open the door and continue to adjust
until the door matches with the striker, open and close door making sure
it closes like factory.
Hint*(leave #1 nut loose until shock is installed Allen set screw will have to be re-adjusted after shock is installed.
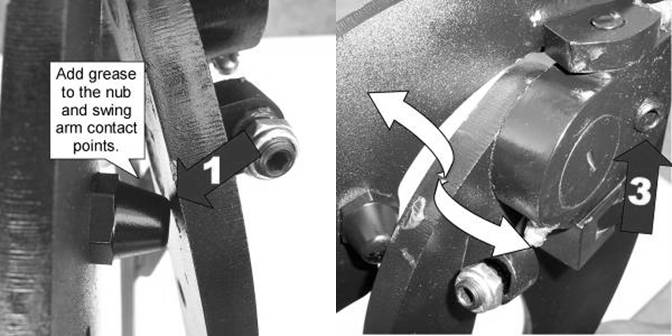
10) Install the shock.
 Hint*
(You will need a helper to raise the door). (Slip the spherical rod
mount into the spherical ball bearing (1). Using a 1/4 Allen wrench,
tighten the screw into the swing arm (2). After the shock is installed
secure it by installing the pin in the bottom shock end (3).
Hint*
(You will need a helper to raise the door). (Slip the spherical rod
mount into the spherical ball bearing (1). Using a 1/4 Allen wrench,
tighten the screw into the swing arm (2). After the shock is installed
secure it by installing the pin in the bottom shock end (3).
11) After shock is installed re-install door panel and lift the door. Adjust door opening screw #3 clockwise until distance between nub and swing arm is enough so that the swing arm moves up and down freely.
Hint* (Fine tune the Allen Adjustment screw (#2) to realigned striker with door. After the door is align test door by opening and closing, lifting and lowering door several times.
Note: Do not install fender until the adjustment of the door is accurate, and the set screw is tightly secure. Also make sure everything is tight, adjustment is set and everything is Locktite.
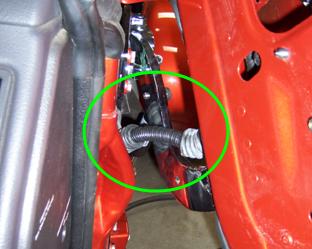
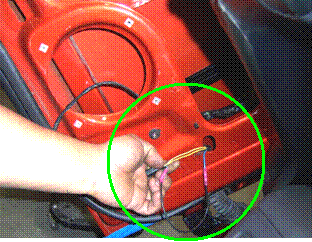
12) Modify factory wire loom:
In order to be able to open and raise the door, cut the factory wire boot in half and add wire loom to protect exposed wires.
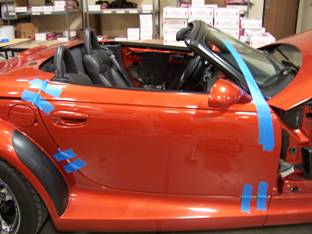
13) Close the door and replace the fender by reversing step 2.
Hint*(Make sure the electrical wires don’t get pinched enough to damage wires)
14) For the other side just follow steps 2-13.